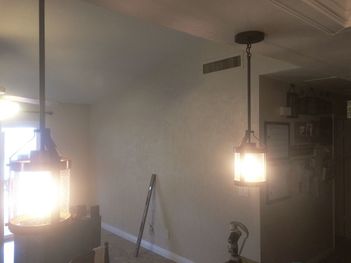
 Before | 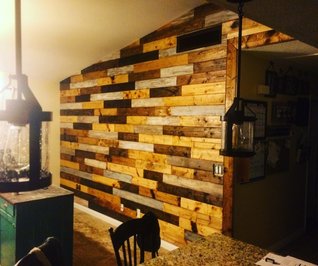 After |
I don't think this really constitutes outdoor writing in any way, but I did want to write about my experience buildling a "pallet wall". Luckily my blog "following" isn't anything substantial, so I don't think any "regular readers" will be disappointed with a non-outdoors related posting. Given the popularity of rustic looking pallet and wood walls, I thought building one in our living room would look good. My wife readily agreed with me and we started the project.
Like all wise people do with good projects, we started at the oracle of knowledge and wisdom: Pinterest. We looked at patterns, methods, ideas, watched videos and read blogs without really being convinced that any of the walls we say matched what we wanted. Breaking apart hundreds of nasty pallets seemed like a waste of time and effort, finding true barnwood near Las Vegas was a chore in and of itself, and using laminate flooring proved to be expensive. After coming to a dead-end on the project we decided to head to Lowes and see what they had to support our desired project outcome. Enter tongue and groove wood planks.
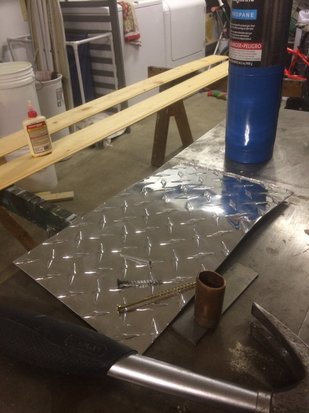
After looking at multiple options at both Lowes and Home Depot, we settled on some 1x6x12 tongue and groove planks (https://www.lowes.com/pd/Common-1-in-x-6-in-x-12-ft-Actual-0-6562-in-x-5-375-in-x-12-ft-Tongue-and-Groove-Pattern-Stock-Southern-Yellow-Pine-Board/999976776). They were warped somewhat, they didn't have a finish look to them, some had tongues chipped off, while others had grooves that weren't perfect. Turns out they were exactly what we wanted! We started by estimating the square footage of the wall, and then came up with the number of boards we thought we needed to cover our wall. Once we had them home we laid them out on saw horses to be stained, burned, and distressed. My wife did this, and while you can't see the details in the photo, the boards are beat up and look "old". She used nuts, bolts, screws, nails, chains, a torch, screwdriver, piece of diamondplate, and a hammer to beat up the boards and give them a more distressed look. Then she used five different colors of Minwax stain, with her white wash boards also getting a coating of white paint (we bought a $3 sample container which was more than enough to cover the white washed boards). We even used some metal stamps to include the initials of the kids into the wall. They love that little touch of custom to the house. They like to ask their friends to try and find their initials on the wall.
While my wife did the board prep work, I set out to get the wall prepped for the build. I used a Bostitch compressor and nail gun, which I bought at Lowes (https://www.lowes.com/pd/Bostitch-0-8-HP-6-Gallon-150-PSI-Pancake-Portable-Electric-Air-Compressor/50396512), hammer, 3 and 4 foot levels, a torpedo level, pack of shims, stud finder, tape measure, miter saw, jig saw, clamps, table saw, framing square, pencil, chisels, rubber mallet, and a cut down shim to hammer the tongue and groove into place.
Step 1 - Wall Prep
I can't undersale just how important it is to prep the wall before installing a pallet wall. I watched a couple Youtube videos where folks were just gluing wood to a wall with liquid nails. I can't stress enough how bad of an idea that is, especially if you think you'll continue living in your home. If you care about long term use of your wall take the time to prep it. If you ever decide to rip the wall down you'll be happy you did. I prepped the wall by sanding, pulling off the vents, and marking studs (from floor to ceiling). I ensured the baseboards were somewhat level as well. I didn't want to get down the line on the first row and realize that I needed to remove some baseboard. All of this ensured that I could use brad nails into the studs for the wall. If I ever want to take it down I can simply patch all the holes, repaint, and move on with life.
Step 2 - Layout
Maybe this should be step 1, but we did it second. My wife drew out the wall and we laid-out how we wanted the wall to look. This included the end cap piece that was around the hallway, pieces around the vents and switch plates, etc. We laid out a measurement for each piece, and what color she wanted where. It really helped me know the scope of the project and what she envisioned as the end result. It might sound stupid, but I really think that the layout was one of the best things we did on the project. I pinned it up on the wall and went to work.
Like all wise people do with good projects, we started at the oracle of knowledge and wisdom: Pinterest. We looked at patterns, methods, ideas, watched videos and read blogs without really being convinced that any of the walls we say matched what we wanted. Breaking apart hundreds of nasty pallets seemed like a waste of time and effort, finding true barnwood near Las Vegas was a chore in and of itself, and using laminate flooring proved to be expensive. After coming to a dead-end on the project we decided to head to Lowes and see what they had to support our desired project outcome. Enter tongue and groove wood planks.
After looking at multiple options at both Lowes and Home Depot, we settled on some 1x6x12 tongue and groove planks (https://www.lowes.com/pd/Common-1-in-x-6-in-x-12-ft-Actual-0-6562-in-x-5-375-in-x-12-ft-Tongue-and-Groove-Pattern-Stock-Southern-Yellow-Pine-Board/999976776). They were warped somewhat, they didn't have a finish look to them, some had tongues chipped off, while others had grooves that weren't perfect. Turns out they were exactly what we wanted! We started by estimating the square footage of the wall, and then came up with the number of boards we thought we needed to cover our wall. Once we had them home we laid them out on saw horses to be stained, burned, and distressed. My wife did this, and while you can't see the details in the photo, the boards are beat up and look "old". She used nuts, bolts, screws, nails, chains, a torch, screwdriver, piece of diamondplate, and a hammer to beat up the boards and give them a more distressed look. Then she used five different colors of Minwax stain, with her white wash boards also getting a coating of white paint (we bought a $3 sample container which was more than enough to cover the white washed boards). We even used some metal stamps to include the initials of the kids into the wall. They love that little touch of custom to the house. They like to ask their friends to try and find their initials on the wall.
While my wife did the board prep work, I set out to get the wall prepped for the build. I used a Bostitch compressor and nail gun, which I bought at Lowes (https://www.lowes.com/pd/Bostitch-0-8-HP-6-Gallon-150-PSI-Pancake-Portable-Electric-Air-Compressor/50396512), hammer, 3 and 4 foot levels, a torpedo level, pack of shims, stud finder, tape measure, miter saw, jig saw, clamps, table saw, framing square, pencil, chisels, rubber mallet, and a cut down shim to hammer the tongue and groove into place.
Step 1 - Wall Prep
I can't undersale just how important it is to prep the wall before installing a pallet wall. I watched a couple Youtube videos where folks were just gluing wood to a wall with liquid nails. I can't stress enough how bad of an idea that is, especially if you think you'll continue living in your home. If you care about long term use of your wall take the time to prep it. If you ever decide to rip the wall down you'll be happy you did. I prepped the wall by sanding, pulling off the vents, and marking studs (from floor to ceiling). I ensured the baseboards were somewhat level as well. I didn't want to get down the line on the first row and realize that I needed to remove some baseboard. All of this ensured that I could use brad nails into the studs for the wall. If I ever want to take it down I can simply patch all the holes, repaint, and move on with life.
Step 2 - Layout
Maybe this should be step 1, but we did it second. My wife drew out the wall and we laid-out how we wanted the wall to look. This included the end cap piece that was around the hallway, pieces around the vents and switch plates, etc. We laid out a measurement for each piece, and what color she wanted where. It really helped me know the scope of the project and what she envisioned as the end result. It might sound stupid, but I really think that the layout was one of the best things we did on the project. I pinned it up on the wall and went to work.
Step 3 - Row 1
The first row is most important
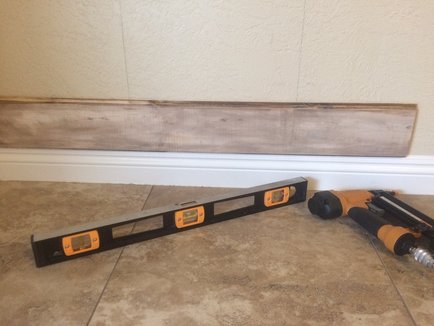
Like many improvement projects, the beginning sets the tone for the entire project. Building a pallet wall is no different. I knew that the first row had to be perfect, or that the wall would all be unlevel. Even if no one else ever knew, I wanted it to turn out perfect. So I cut the first piece of wood about 3 feet, which would allow me to nail it into two studs (I used 18 gauge 2 " finish nails). After nailing one side of the wood, I ensured that the length of the board was perfectly level before nailing the full length of the board. I want to stress that getting the ground level, well -- level, is critical. If that first row isn't level it'll be difficult to get the rest of your project correct.
Step 4 - Any joints should be installed next
So what do I mean by joints? For me, it is any place that vertical wood will join with horizontal wood. For my project, the frame around the hallway was an important joint that I installed at the same time I finished my first row. I wanted to ensure that the pieces sat flush with one another, so I wanted the frame done. The AC vent didn't get framed first, because I jig-sawed the vent spacing out, to ensure that the vent didn't stand-out in the finished project. I also jig-sawed around any electrical or cable outlets.
Step 5 - Fire away
Once you've made it to this point you've done all the hard work. Now that the first row is in you can also get to work laying the rest of the wall. I put a level on every single piece of wood before nailing it. I didn't want the wall to walk on me and get off level at any point during the project. Leveling each piece ensured that once it was done all the boards were level to the eye.
The first row is most important
Like many improvement projects, the beginning sets the tone for the entire project. Building a pallet wall is no different. I knew that the first row had to be perfect, or that the wall would all be unlevel. Even if no one else ever knew, I wanted it to turn out perfect. So I cut the first piece of wood about 3 feet, which would allow me to nail it into two studs (I used 18 gauge 2 " finish nails). After nailing one side of the wood, I ensured that the length of the board was perfectly level before nailing the full length of the board. I want to stress that getting the ground level, well -- level, is critical. If that first row isn't level it'll be difficult to get the rest of your project correct.
Step 4 - Any joints should be installed next
So what do I mean by joints? For me, it is any place that vertical wood will join with horizontal wood. For my project, the frame around the hallway was an important joint that I installed at the same time I finished my first row. I wanted to ensure that the pieces sat flush with one another, so I wanted the frame done. The AC vent didn't get framed first, because I jig-sawed the vent spacing out, to ensure that the vent didn't stand-out in the finished project. I also jig-sawed around any electrical or cable outlets.
Step 5 - Fire away
Once you've made it to this point you've done all the hard work. Now that the first row is in you can also get to work laying the rest of the wall. I put a level on every single piece of wood before nailing it. I didn't want the wall to walk on me and get off level at any point during the project. Leveling each piece ensured that once it was done all the boards were level to the eye.
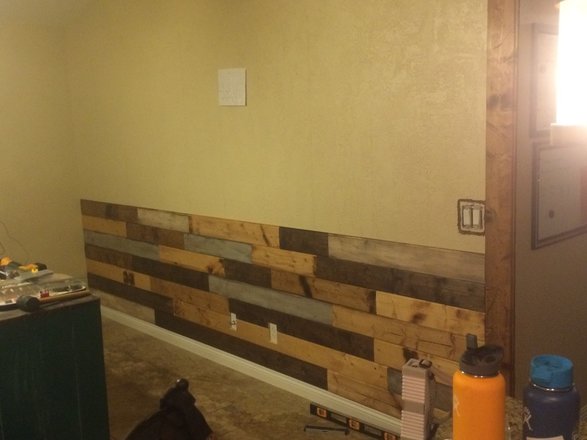
You can see here that we are about 1/4 of the way done with the wall at this point. You'll see that we've jig-sawed the outlets, but that we've also painted dark brown around the light box. We painted around the boxes because we wanted any gaps there to look dark, as opposed to the original wall color. While we didn't end up with any major gaps, this ensured that from a distance the wall wouldn't have any glaring deficiencies. If you're using try pallets or wood that will have serious gaps in it, I'd recommend painting the wall a darker brown or grey to mask any gaps in the wood. This will make your project a little more forgiving. We didn't paint the entire wall as we were using the tongue and groove which we knew would lock into place better than mismatched pallet pieces.
Tip: Spray paint any metal vents and reinstall them before moving on. This will ensure that your wood matches up to the vent perfectly. You'll note that we painted ours dark brown to match up with the color scheme of the wall.
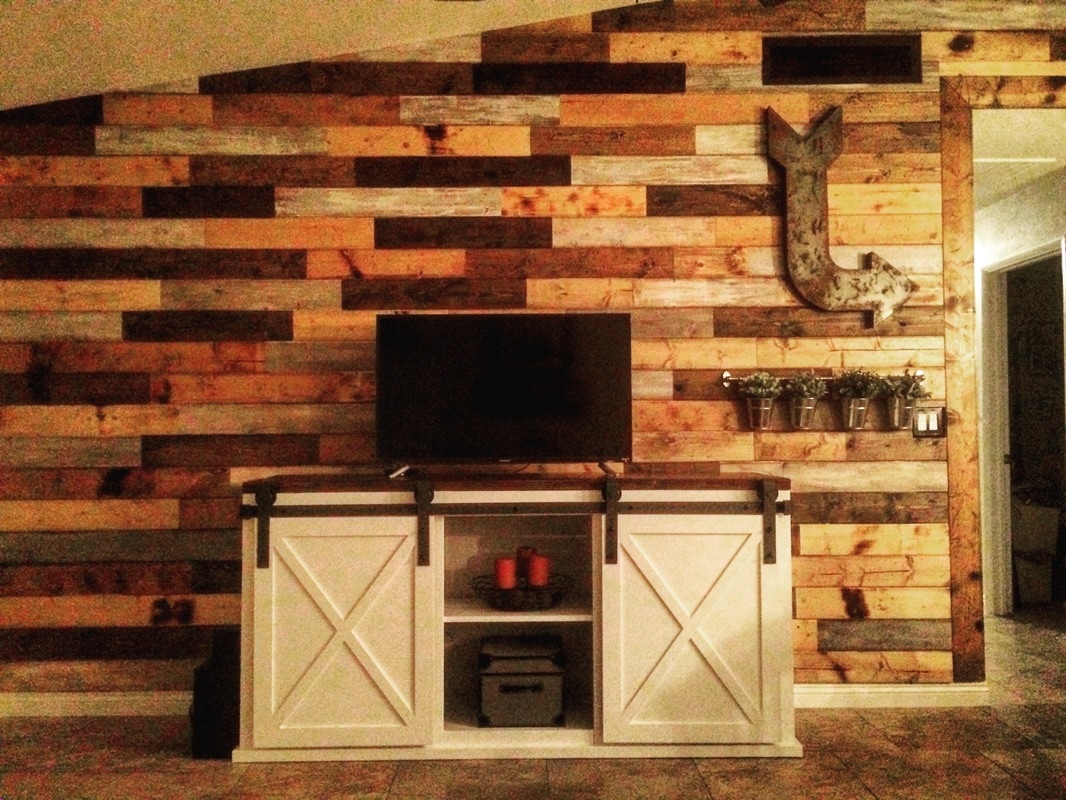
Once we reached the vaulted ceiling all of the cuts were angled. This made for some serious time and effort, along with some throwing of boards, but getting the cuts to match the ceiling was important to me. The effort paid off as the ceiling pieces match the pitch of the roof perfectly. I'm very happy with the end result.
Tip: Spray paint any metal vents and reinstall them before moving on. This will ensure that your wood matches up to the vent perfectly. You'll note that we painted ours dark brown to match up with the color scheme of the wall.
Once we reached the vaulted ceiling all of the cuts were angled. This made for some serious time and effort, along with some throwing of boards, but getting the cuts to match the ceiling was important to me. The effort paid off as the ceiling pieces match the pitch of the roof perfectly. I'm very happy with the end result.
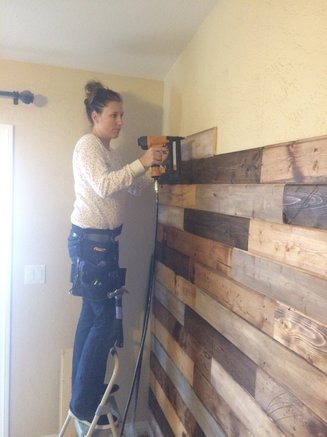
Having an extra set of hands to work on the project is very helpful, and will really move things along. My wife has a can do attitude and we tackled this project during her break from nursing school. I bought her a tool belt and taught her how to read the 1/16" marks on the tape. With a quick lesson on safety we were off. Notice she isn't wearing her eye protection in this photo! Always wear eye and ear protection when working with power tools! Her pay was docked for this safety infraction. To be fair, she did all the distress, stain, and paint work on the boards, did some cuts on the miter saw, and learned to use the finish nailer during this project. I was thrilled to have her there to help me out, and it mad us proud of our project build. She is new to construction and remodel work, but I'm not. I'd highly recommend working with someone who knows about basics of woodwork and craftsmanship. Teaching my wife about using a square, angle finder, cutting angles, using power tools, using shims, splitting the difference, etc was a subtle reminder that some large projects aren't for beginners. If you're worried about your experience or knowledge read a few books, blogs, and watch some videos. Learn about basic techniques and tools before undertaking a large project like this. The key is in the preparation. Go in with a plan and stick to it. Work around the issues and be patient. I got frustrated with the tongue and groove and we went out to dinner, took a break and when I came back I was able to be productive. Don't let the project get the best of you!
 RSS Feed

