"Of all the questions which can come before this nation, short of the actual preservation of its existence in a great war, there is none which compares in importance with the great central task of leaving this land even a better land for our descendants than it is for us."
0 Comments
Farmhouse decor seems to be all the rage right now. At least, that's what my Pinterest feed tells me. My wife seems to have the farmhouse bug right now, which has resulted in her wanting a new "rustic" entertainment center. I get confused with all the oxymorons that revolve around decor and styles, like shabby chic or something like a farmhouse entertainment center. All the farmhouses I've visited have tractors and chores, which leave next to no time for xbox, wii, hulu, netflix, etc. Regardless, my wife wanted a farm style entertainment center, so I went to work, well actually I went to Lowes.
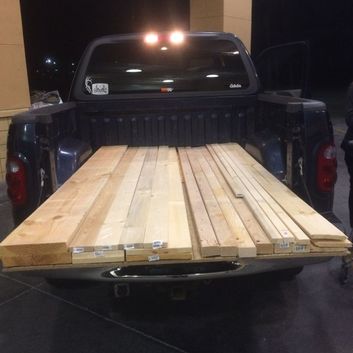
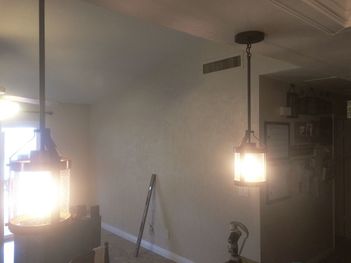
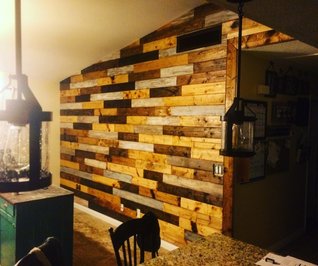
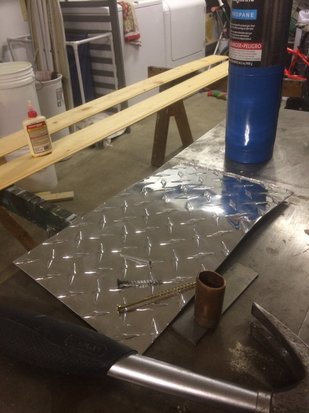 I don't think this really constitutes outdoor writing in any way, but I did want to write about my experience buildling a "pallet wall". Luckily my blog "following" isn't anything substantial, so I don't think any "regular readers" will be disappointed with a non-outdoors related posting. Given the popularity of rustic looking pallet and wood walls, I thought building one in our living room would look good. My wife readily agreed with me and we started the project. Like all wise people do with good projects, we started at the oracle of knowledge and wisdom: Pinterest. We looked at patterns, methods, ideas, watched videos and read blogs without really being convinced that any of the walls we say matched what we wanted. Breaking apart hundreds of nasty pallets seemed like a waste of time and effort, finding true barnwood near Las Vegas was a chore in and of itself, and using laminate flooring proved to be expensive. After coming to a dead-end on the project we decided to head to Lowes and see what they had to support our desired project outcome. Enter tongue and groove wood planks. After looking at multiple options at both Lowes and Home Depot, we settled on some 1x6x12 tongue and groove planks (https://www.lowes.com/pd/Common-1-in-x-6-in-x-12-ft-Actual-0-6562-in-x-5-375-in-x-12-ft-Tongue-and-Groove-Pattern-Stock-Southern-Yellow-Pine-Board/999976776). They were warped somewhat, they didn't have a finish look to them, some had tongues chipped off, while others had grooves that weren't perfect. Turns out they were exactly what we wanted! We started by estimating the square footage of the wall, and then came up with the number of boards we thought we needed to cover our wall. Once we had them home we laid them out on saw horses to be stained, burned, and distressed. My wife did this, and while you can't see the details in the photo, the boards are beat up and look "old". She used nuts, bolts, screws, nails, chains, a torch, screwdriver, piece of diamondplate, and a hammer to beat up the boards and give them a more distressed look. Then she used five different colors of Minwax stain, with her white wash boards also getting a coating of white paint (we bought a $3 sample container which was more than enough to cover the white washed boards). We even used some metal stamps to include the initials of the kids into the wall. They love that little touch of custom to the house. They like to ask their friends to try and find their initials on the wall. While my wife did the board prep work, I set out to get the wall prepped for the build. I used a Bostitch compressor and nail gun, which I bought at Lowes (https://www.lowes.com/pd/Bostitch-0-8-HP-6-Gallon-150-PSI-Pancake-Portable-Electric-Air-Compressor/50396512), hammer, 3 and 4 foot levels, a torpedo level, pack of shims, stud finder, tape measure, miter saw, jig saw, clamps, table saw, framing square, pencil, chisels, rubber mallet, and a cut down shim to hammer the tongue and groove into place. Step 1 - Wall Prep I can't undersale just how important it is to prep the wall before installing a pallet wall. I watched a couple Youtube videos where folks were just gluing wood to a wall with liquid nails. I can't stress enough how bad of an idea that is, especially if you think you'll continue living in your home. If you care about long term use of your wall take the time to prep it. If you ever decide to rip the wall down you'll be happy you did. I prepped the wall by sanding, pulling off the vents, and marking studs (from floor to ceiling). I ensured the baseboards were somewhat level as well. I didn't want to get down the line on the first row and realize that I needed to remove some baseboard. All of this ensured that I could use brad nails into the studs for the wall. If I ever want to take it down I can simply patch all the holes, repaint, and move on with life. Step 2 - Layout Maybe this should be step 1, but we did it second. My wife drew out the wall and we laid-out how we wanted the wall to look. This included the end cap piece that was around the hallway, pieces around the vents and switch plates, etc. We laid out a measurement for each piece, and what color she wanted where. It really helped me know the scope of the project and what she envisioned as the end result. It might sound stupid, but I really think that the layout was one of the best things we did on the project. I pinned it up on the wall and went to work. 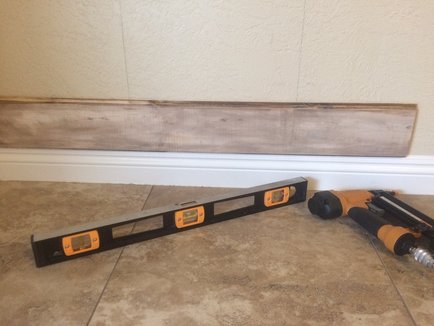 Step 3 - Row 1 The first row is most important Like many improvement projects, the beginning sets the tone for the entire project. Building a pallet wall is no different. I knew that the first row had to be perfect, or that the wall would all be unlevel. Even if no one else ever knew, I wanted it to turn out perfect. So I cut the first piece of wood about 3 feet, which would allow me to nail it into two studs (I used 18 gauge 2 " finish nails). After nailing one side of the wood, I ensured that the length of the board was perfectly level before nailing the full length of the board. I want to stress that getting the ground level, well -- level, is critical. If that first row isn't level it'll be difficult to get the rest of your project correct. Step 4 - Any joints should be installed next So what do I mean by joints? For me, it is any place that vertical wood will join with horizontal wood. For my project, the frame around the hallway was an important joint that I installed at the same time I finished my first row. I wanted to ensure that the pieces sat flush with one another, so I wanted the frame done. The AC vent didn't get framed first, because I jig-sawed the vent spacing out, to ensure that the vent didn't stand-out in the finished project. I also jig-sawed around any electrical or cable outlets. Step 5 - Fire away Once you've made it to this point you've done all the hard work. Now that the first row is in you can also get to work laying the rest of the wall. I put a level on every single piece of wood before nailing it. I didn't want the wall to walk on me and get off level at any point during the project. Leveling each piece ensured that once it was done all the boards were level to the eye. 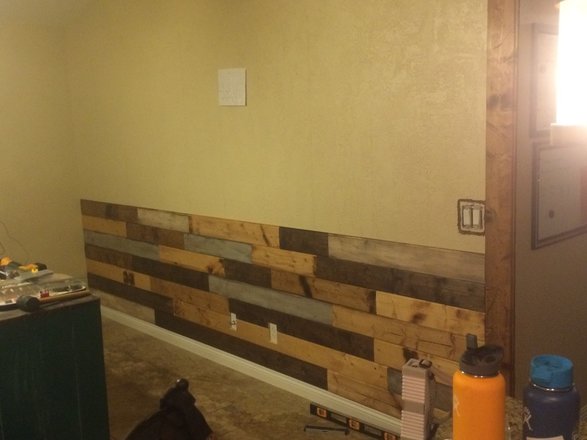 You can see here that we are about 1/4 of the way done with the wall at this point. You'll see that we've jig-sawed the outlets, but that we've also painted dark brown around the light box. We painted around the boxes because we wanted any gaps there to look dark, as opposed to the original wall color. While we didn't end up with any major gaps, this ensured that from a distance the wall wouldn't have any glaring deficiencies. If you're using try pallets or wood that will have serious gaps in it, I'd recommend painting the wall a darker brown or grey to mask any gaps in the wood. This will make your project a little more forgiving. We didn't paint the entire wall as we were using the tongue and groove which we knew would lock into place better than mismatched pallet pieces. Tip: Spray paint any metal vents and reinstall them before moving on. This will ensure that your wood matches up to the vent perfectly. You'll note that we painted ours dark brown to match up with the color scheme of the wall. Once we reached the vaulted ceiling all of the cuts were angled. This made for some serious time and effort, along with some throwing of boards, but getting the cuts to match the ceiling was important to me. The effort paid off as the ceiling pieces match the pitch of the roof perfectly. I'm very happy with the end result. 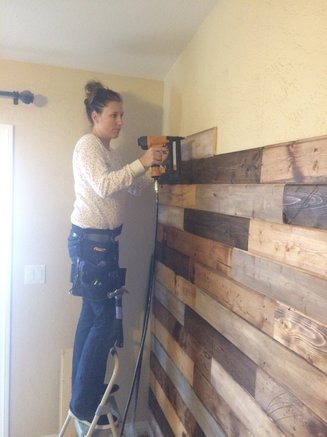 Having an extra set of hands to work on the project is very helpful, and will really move things along. My wife has a can do attitude and we tackled this project during her break from nursing school. I bought her a tool belt and taught her how to read the 1/16" marks on the tape. With a quick lesson on safety we were off. Notice she isn't wearing her eye protection in this photo! Always wear eye and ear protection when working with power tools! Her pay was docked for this safety infraction. To be fair, she did all the distress, stain, and paint work on the boards, did some cuts on the miter saw, and learned to use the finish nailer during this project. I was thrilled to have her there to help me out, and it mad us proud of our project build. She is new to construction and remodel work, but I'm not. I'd highly recommend working with someone who knows about basics of woodwork and craftsmanship. Teaching my wife about using a square, angle finder, cutting angles, using power tools, using shims, splitting the difference, etc was a subtle reminder that some large projects aren't for beginners. If you're worried about your experience or knowledge read a few books, blogs, and watch some videos. Learn about basic techniques and tools before undertaking a large project like this. The key is in the preparation. Go in with a plan and stick to it. Work around the issues and be patient. I got frustrated with the tongue and groove and we went out to dinner, took a break and when I came back I was able to be productive. Don't let the project get the best of you! 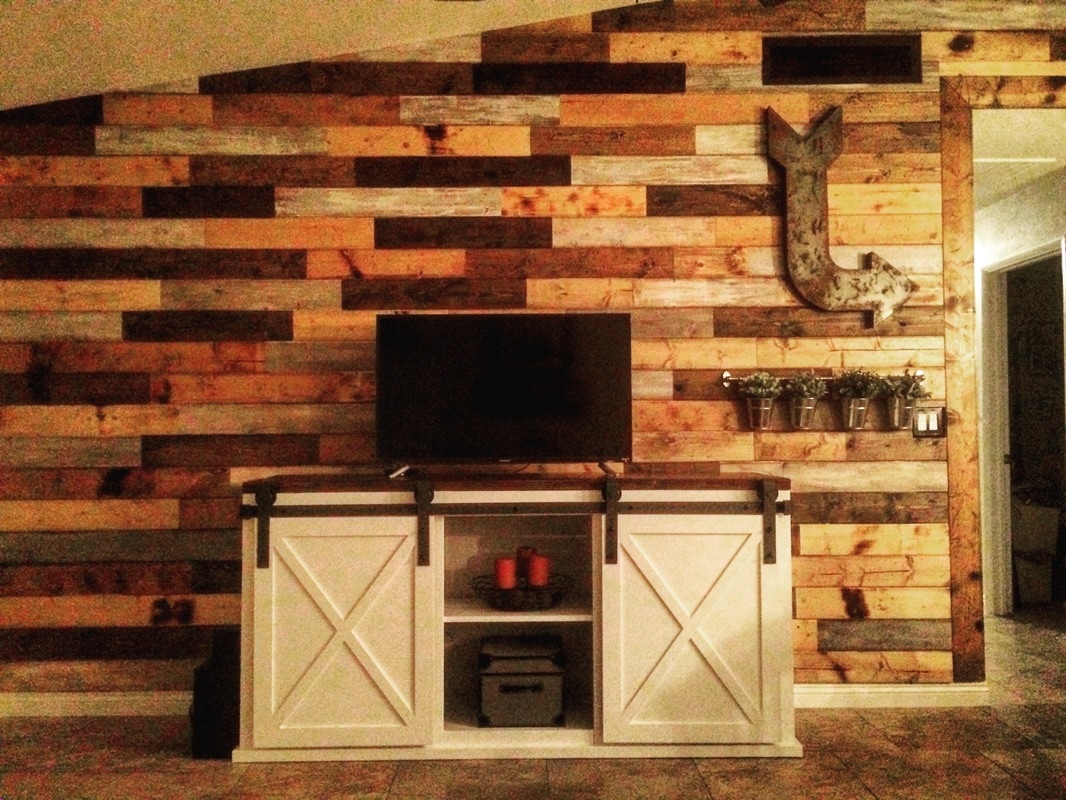 With his GoPro rolling footage, a Styrofoam cup of nightcrawlers waiting nearby, and his Little League jersey on, he ferociously set the hook on another Green Sunfish. The hit couldn't have merited the huge jerk of the rod, but with each successive fish you'd have thought some serious large-mouth bass were taking his pond offerings. Not that I cared about his fishing style, but given the small fish in the pond I found it interesting, so I kept watching as I tossed a fly. Eventually he landed a fairly nice Sunfish. Pulling the hook out with his fingers he showed the impressive fish the camera and, as if tossing out an empty Coke can, threw the fish back. The urban pond near home is concrete lined and the fish was big enough that he made contact with it after breaking the water. The boy's mom yelled his name, but said nothing more. The fish, somewhat stunned, tailed in the shallow water for a few minutes before finally getting his bearings back and slowly moving to deeper, safer waters. The kid threw another chunk of worm on the hook, cast again, and waited for another opportunity to set a hook. Having seen enough I loaded up the fly rod and slowly drove home.
Surely the large sunfish survived being tossed into the pond; however, the way this boy and his mother fished left me thinking about my ethics in the outdoors and how they might be portrayed by others. See, with social media, cell phone cameras everywhere, and videos always being made our actions as sportsmen are always on display. Why give any anti-fishing, anti-hunting, anti-public lands, pro development folks fuel when we don't need to? Our actions in the outdoors and the photos and videos we make are some of the most powerful ways that we can show we support wildlife and wild places. Below I've outlined a couple things we can all do to be an ethical outdoorsman. One of the easiest ways to be an ethical outdoorsman is to practice Leave No Trace ethics. How many times have you stumbled into what you thought was a primitive camping area only to discover that someone had a massive bonfire, left their pallets for burning, left bottles and cans, and left half burnt garbage in the ad hoc fire ring? My son and I went quail hunting this fall and came across just such a camp. His 7 year old mind was already working when we pulled into the spot. He piped up and said, "dad why would someone do this"? I could only tell him that I didn't know, but we could leave the site much better than we found it. Practice a Leave No Trace ethic. Take your garage (don't burn it), disperse your fire ring once the ashes have totally cooled, ensure any human waste is properly covered, don't hack all the trees in the area for wood, and ensure the site looks like you've never been there. This includes ATV and OHV use. We can be our own worst enemies when it comes to ATV/OHV usage. Be smart when riding, stay on existing roads, and use your ATV as a tool during the hunt. Don't use it as a crutch! We've all been with the friend who touts, "well I've never been stopped by a game warden so I just don't get a license to fish/hunt/trap". Sometimes it is because they're in the backcountry, others it is because of the cost, and sometimes it is because they fail to recognize that their license fees are used to conserve the very fish and game they seek. One of the best ways to be an ethical outdoorsman is to get a license and pay for your stamps, tags, and permits. For example, the Duck Stamp has resulted in over $800 million going toward conservation for migratory birds (USFWS, 2016). That money came from outdoorsman, and is ultimately used to benefit both them and the wildlife they hunt. Those fees can have a big impact when pooled together, and if we all recognize the good fees can do we may find ourselves digging into our pockets before we head out with a rod or rifle. Before I get off my soapbox let me make one more suggestion. Photos and videos. Being an ethical outdoorsman also means being a smart marketer. Don't be the hunter posting that photo or video of a deer with blood spilling out its nose, a hole in its body, or its tongue hanging out of its mouth. Be respectful of the game, the chase, and the opportunity to hunt. Clean up the animal and give it the respect it deserves, after all, you just took its life. Be aware of the hashtags you use as well. This helps show that sportsman do care about the animals that they pursue, that consume their thoughts, and have become their passion. Give the animal the respect it deserves, it'll help us go further in discussions with groups who don't approve of our actions in the outdoors. Similarly, keep in mind how you handle fish and how you release them. Why not help state and local wildlife management agencies out by being an ethical outdoorsman and leaving no trace, getting your fishing license, all required stamps, and by treating wildlife with respect? It isn't something that is difficult, and as we face increasing political pressure around firearms, land ownership and access, and other pressing issues it will show that we are a smart, ethical, and conservation oriented group that cares about doing what is right. This article was aimed at fishermen and hunters, but I'm also a mountain biker, trail runner, rock climber, and general outdoor enthusiast. Many of the same comments and suggestions apply to all outdoorsmen. I've seen spur trails and kickers made by ambitious mountain bikers, gel packets at the bottom of the Grand Canyon left from ones Rim-Rim-Rim quest, and climbers moving up closed routes. Again, we can all be better at ensuring the special places we visit are left pristine by being conscientious and ethical in our decisions. 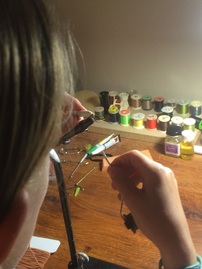 13 years ago I showed up to my wife’s house only to find her rolling out from under her car. Turns out her car needed an oil change and she was the man, errr woman, for the job. Since then I’ve seen her outshoot men, beat them in marathons, and teach our daughters that they can do whatever they put their mind to. I don’t know that I equate my wife with a feminist, and perhaps that is a misogynistic error on my part, but in many ways she totally is. After all, not many women decide to go get a nursing degree when they’re 33 and have three kids at home. So what does this have to do with gear, the outdoors or anything that might be of interest to you? Keep reading, I’ll get there. As a father I’ve noticed that females like the Kardashians, Miley Cyrus, and the Wives of Beverly Hills tend to garner a fair amount of attention. Attention that I consider to be unwarranted and based on no real accomplishment. So, in a world where a nearly nude Kim Kardashian makes the news and headlines around the internet, how can I ensure that my daughters have enough self-respect, self-confidence, and self-esteem to follow their aspirations, which are more than like, follows, and retweets? As an outdoorsman I’ve noticed that increasingly there is a propensity to see women in the field, women specific gear at the store, women with massive trout, women paddling drift boats, and camo adorned women on social media. This month’s Field and Stream, who usually has male enhancement ads for its nearly all male readership, even pays tribute “gamechangers” as they call them. More aptly their cover story is focused on “11 outdoorswomen who are transforming the face of hunting and fishing”. As I read the magazine it dawned on me that my concerns for my daughters and their self-images have answers that are found in the outdoors. My 10 year old daughter loves art. She draws very well, colors and doodles on nearly every piece of paper in the house, and frequently is making something out of yarn, fabric, paper, or any number of other consumables. She also is timid. I’ve been working with her over the years to build a core self-esteem, and one of the founding principles of that is she can do anything she puts her mind to. By anything I mean she can shoot a gun, she can cast a fly, beat her male classmates at one on one, and can discover new things under a microscope. See, as a conservationist, environmental scientist, has been athlete, and outdoorsman my offerings as a father are mainly based on those areas of “expertise”. Teaching those things to my son is second nature, and accepted by society as normal. After all, a boy spitting, carrying a knife, and talking about shooting a quail is generally accepted, even in the city slicker haven in which we currently live. Having a daughter who wears baseball hats, carries a fishing rod, knows the difference between a muley and a whitetail, and talks about fly patterns is a bit of a misnomer in the big city. But the outdoors have played a major role in helping me parent my daughter. Recently, her affinity for art has made its way to the fly tying vise. We’ve been spending evenings discussing fly patterns, colors, and fly material terminology while chasing sunfish at the local pond. I woke up one morning to see her sitting at the vise tying a bright yellow woolly bugger, which she proudly gave to me over breakfast. After she pulled in a very nice bluegill last week, talk turned to developing a fly that mimicked a cricket. When I told her dad’s trout arsenal already included a couple cricket patterns, she spouted off that she wanted to develop her own pattern, and name it. Fast forward to last night when we spent an hour or so at the vise. With some chenille, foam, rubber legs, and a hook she developed her very own cricket. No pattern, no book, no youtube video, just her imagination and a little bit of guidance from dad. After a few whip finishes we tied it onto her line, threw our rods in the truck, and hit the pond. I had tied the same pattern, and we both pulled in fish on the first cast. Her second cast proved to be just as successful, and the look on her face told the story. She outfished dad with the fly she developed and tied herself. I'm not sure who was more proud, but the ride home was filled with excitement. The outdoors, once a place for men, are becoming a place where girls and women can roam too. No longer are waders only made for men, although, after reading the facebook post of a friend who is an outdoor author and fisherwoman, we haven’t totally balanced the field when it comes to gear. But knowing that my daughter is growing up in a world where she can tie her own fly, pick a rod made for her, put on waders and gear made for her, and then go outfish the guys on the river gives me some satisfaction. The outdoors have given her a better sense of self, have shown her what she is capable of, and given her the self-esteem that will guide her through life’s journey. She’s come to realize there really isn’t much she can’t do. From shooting a bow to climbing 5.10 routes, to tying a fly and shooting her .22 with accuracy, to saddling a horse and baiting her own hook, she has learned that doing things yourself comes with some satisfaction. When she exclaimed that she was going to start her own fly tying business I stopped myself before blurting out “honey there are hundreds of fly tiers on the internet”, and instead said, “that sounds like a great idea honey. Let’s think of a name and get tying”. The time we’ve spent at the vise has been the best I’ve had in months, and it reminds me of what is most important in this life. So fathers, husbands, brothers, and uncles, it’s time to use the outdoors to solidify the relationships with the ladies in our lives. Sure we’ll help build self-esteem and encourage them to be adventurous along the way, but I’m willing to bet we’ll get far more out of the deal. I certainly have, all thanks to my Peanut. 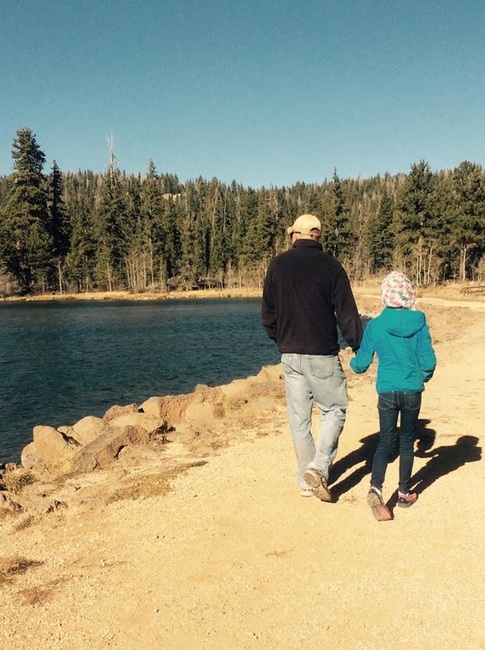 |
The Gear BinConservation talk, and our occasional outdoor musings. Archives
July 2017
Categories
|
The Gear Bin
 RSS Feed
